

Advertisment
Picnic Table Plans (Page Five)
|
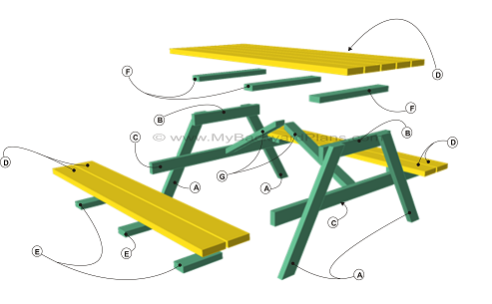
Picnic Table Plans Material/Cut List
A- (Qty 4) - 2X4 - 36"
B- (Qty 2) - 2X4 - 26 1/2"
C- (Qty 2) - 2X4 - 58"
D- (Qty 9) - 2X6 - 72"
E- (Qty 6) - 2X4 - 10"
F- (Qty 3) - 2X4 - 26 1/2"
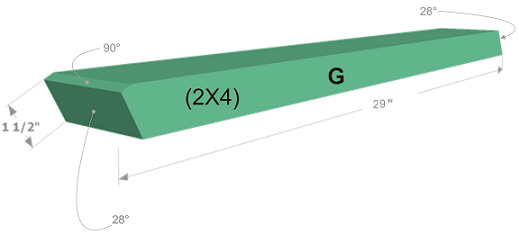
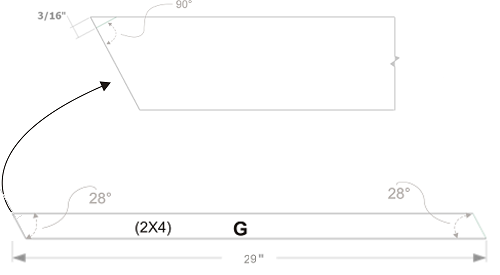
G- (Qty 2) - 2X4 - 29"
|
Measure and cut G to size, see picture below. This part will serve as a brace to give the table support. The ends are cut 28 deg. on both sides, opposite direction. The top side will as will have a 90 deg. angle cut to make the part fit flush. See details below.
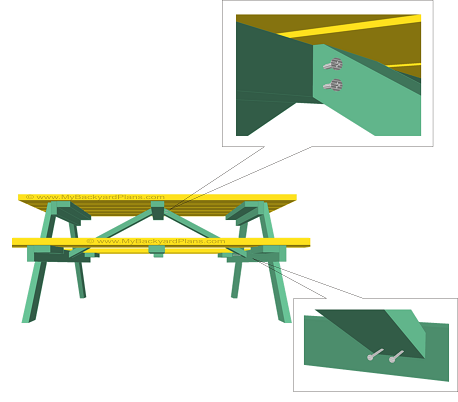
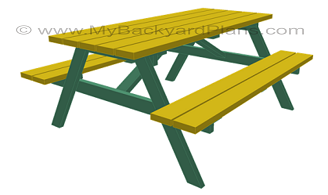
Next install G use 2 1/2" deck screws and assemble as shown below. To make installing the brace easier carefully turn table upside down. Pre-drill holes and toe-screw through G and into F on top. For the bottom screw through G and into C. See details below. Sand table and sharp edges, finally paint or stain. Picnic table is now completed.
|
|
|
| |
My Projects | About
Me | Resources | Privacy
Policy | Site Map | Contact
Us | Disclaimer
![]()
© www.MyBackyardPlans.com