

Advertisment
Gambrel storage shed front/back walls & door details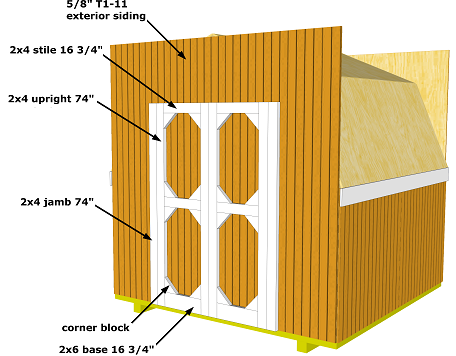 |
Material needed for the gambrel storage shed front wall & door |
|
Lay out the door frame parts on a work table, nail the base and stiles to the uprights, this is temporary, when the siding is nailed to the door frame it will get it’s strength.
Screw the 4 inch butt hinges to the uprights. Then screw it to the jamb. I used c clamps to hold the jambs in place. The jamb is not even with the upright, it should stick out 1/4 inch past the upright top, this will allow the door to swing freely and not hit the lintel.
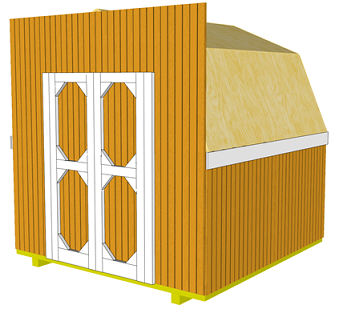
The T1-11 siding has a lip on the edge that overlaps the opposite siding. The flat end of the siding will be flush with door frame upright. The opposite siding will stick out past the door frame upright. When the door is closed, the lip on the siding will overlap giving the door a tight seal.
Nail through the back of the siding and into all the door parts.
With a straight edge draw a line between the door jamb and door frame upright. Draw another line on top of the door frame stile. With a skill saw cut along the line, do not cut out completely, leave about three 4" sections to keep the door from swinging open and keep it square. 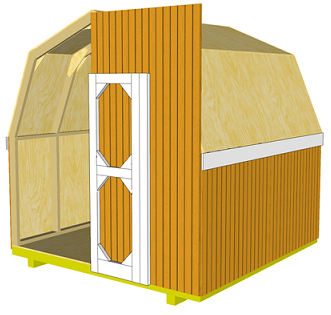
Nail the front wall to the side wall frame, push the side wall in or out to square it. Nail it to the roof rafters, and nail the bottom. 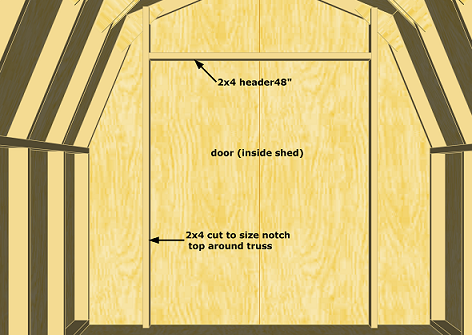
Once you nail both sides go inside and finish cutting the uncut sections with a hand saw. Nail the header on top, cut 2x4 to length, for sides of the door. Let the header hang down 1/2 inch below the top of the door, this will serve as a door stop. Go outside and nail through the door jambs and into the studs you installed. Install the lintel on top of the door. 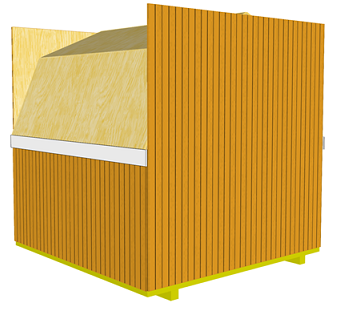
Install the back wall. Nail the back wall to the side wall frame, push the side wall in or out to square it. Nail it to the roof rafters, and nail the bottom.
Leave the siding sticking up, once you nail all the siding you can cut it using a hand saw, reciprocating saw, or router. |
|
|
Related Articles
Building A Shed: A Brief Overview If you need extra storage space in your garden for tools and gardening supplies, you may want to consider building a shed. Not everyone is an accomplished handyman, but you do not have to be an expert builder to build a shed.
Storage Sheds - Buying Guide for Sheds All about storage sheds. Helpful information, advice and tips before you make the purchase.
|
My Projects | About
Me | Resources | Privacy
Policy | Site Map | Contact
Us | Disclaimer
![]()
© www.MyBackyardPlans.com